5 ways to master marker management 🚩

The previous article provided you with the keys to managing breaths in your DAW. This time, we will focus on managing markers in music production software. Whether it's to create a soundtrack for visuals or simply to navigate your session more effectively, mastering markers is essential to ensure a smooth workflow. 🚀
Just like the markings on the ground guide your path, the markers in your STAN help you navigate accurately through your sessions. 🚀
Introduction to marker management:
In modern music production, effectively managing recording and mixing sessions is crucial for achieving professional results. This is where markers come into play. They are valuable tools in your digital audio workstation (DAW) for marking and quickly navigating through your session.
Whether you are a music producer, sound engineer, or composer, markers are essential for organizing, locating, and accessing specific sections of your composition. They allow you to identify important positions on the timeline (or ruler), such as the beginning and end of a section, time sync points, or entire musical regions.
As mentioned in the article "8 Tips to Professionalize Your Music Productions," structuring your sessions well will help you improve your productivity and make navigation easier, especially when you revisit a session after several days or months.
In this article, we will explore in more detail the various features of markers in DAWs, the methods for placing them on the timeline, and practical tips for maximizing their use.
Understanding the different types of markers 🚩
In digital music production, there are several types of markers. Here are the main ones:
Position markers: they indicate specific positions on the timeline, thereby facilitating navigation within a session. They are often used to highlight points of interest or synchronization markers for a video.
Region markers: Instead of marking a single point, they define entire sections of music. They are useful for marking parts of songs such as verses, choruses, bridges, etc. These markers help to structure the overall composition.
Markers can be placed on the timeline in two ways:
Based on time: when the tempo changes, the markers remain in place and do not follow the metric. This is crucial for synchronization with the video.
Based on the metric: when the tempo changes, the markers move accordingly. This is essential for marking musical sections.
Use of position markers in notation 🎥
For the composition, markers are essential. Before composing, it is crucial to identify the key moments of the sequence that deserve to be highlighted.
I recommend placing markers before starting the composition. This analysis process helps you identify the elements to highlight and familiarize yourself with the video content.
⚠️ The synchronization markers must be time-based to stay in sync with the video if the metric or tempo changes!

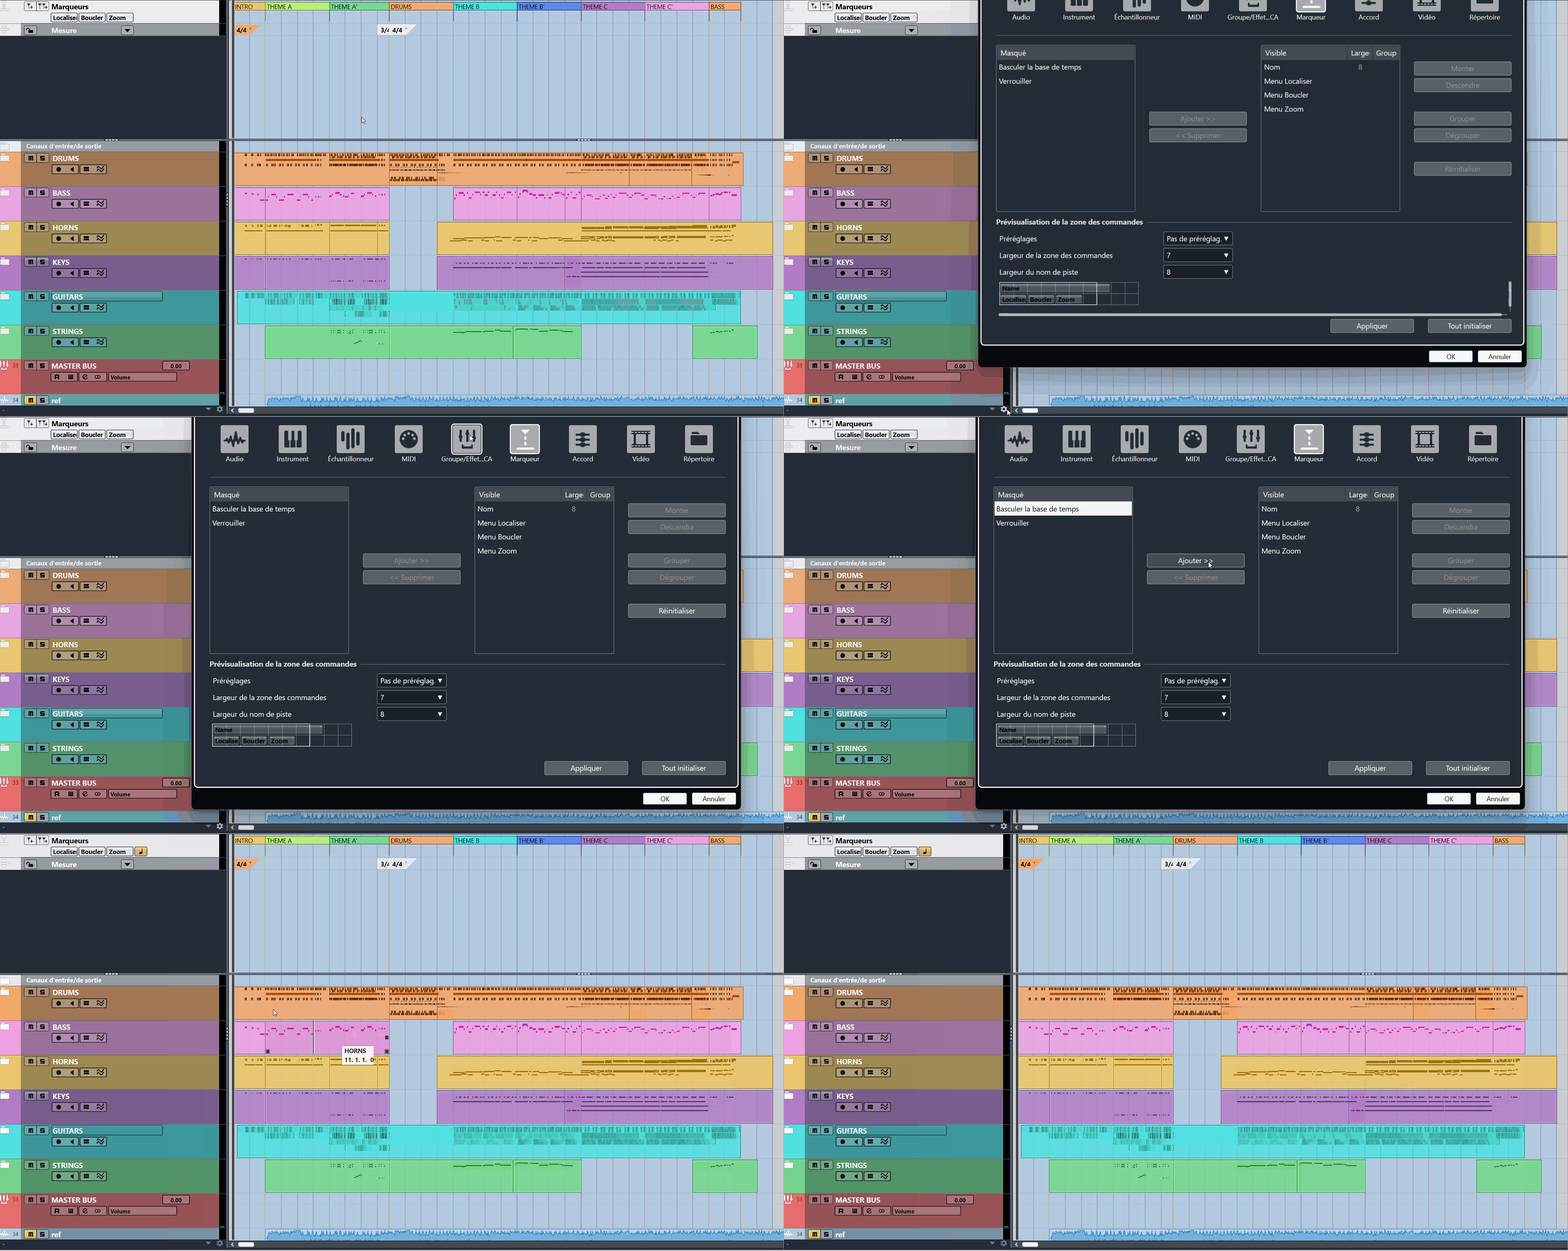
In Cubase, the button that allows you to switch between the time mode (linear time) and the metric mode (measures/linear time) is sometimes hidden. Here’s how to find this missing icon.
Regional markers 🔄️
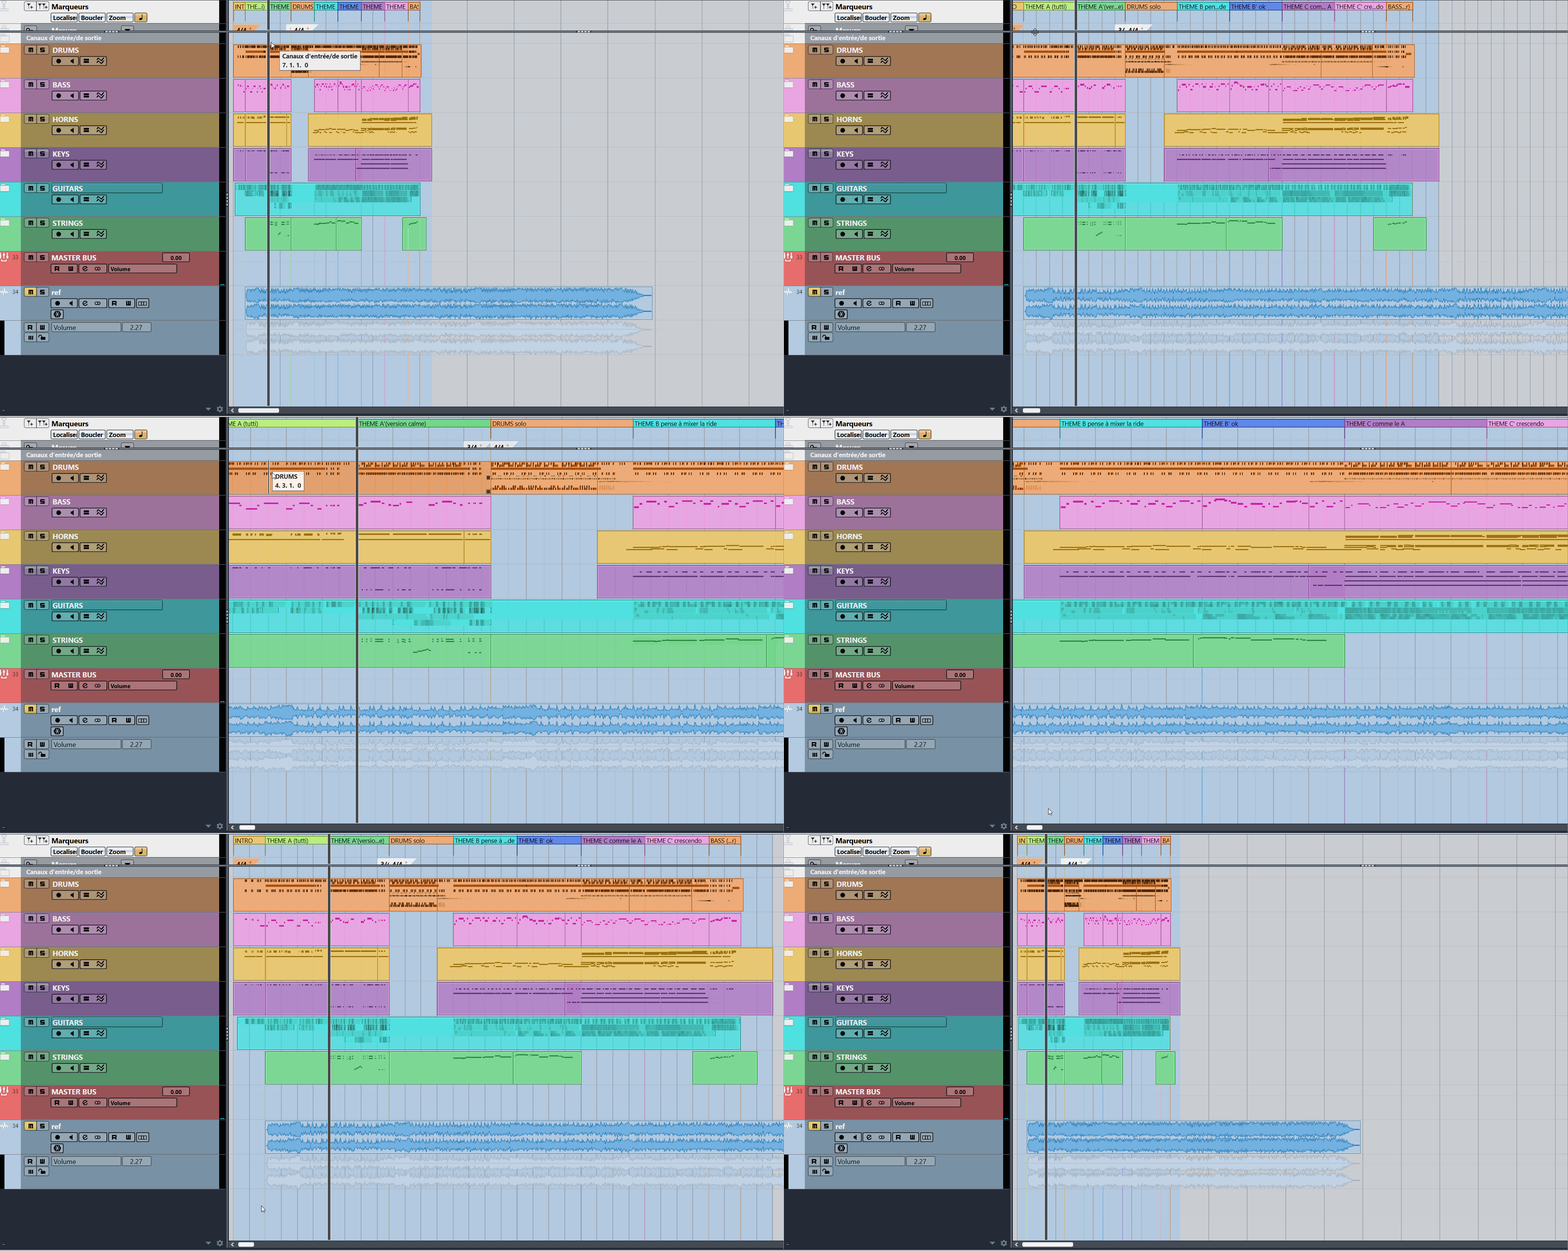
I often emphasize that organizing your session is essential for working efficiently. It also provides an overview of your composition. The area markers help identify the different parts and navigate quickly between them.
More recent than position markers, they are now integrated into most modern DAWs, each with its own specific features. They all allow you to create a visual reference that you can label with a name, a number, and even a color.
You can use them to identify:
Structure: couplets, refrains, etc.
Melodic sections: Theme A, Theme B, etc.
Temporal signature changes: for example, a measure of 2/4.
💡 Use a consistent color code for all your sessions. Personally, I always mark presentations in yellow 🟨.

💡Since the section markers cover long areas, you can use them to add comments.
Advanced marker features in various DAWs 🚀
To go further, I suggest we explore some advanced features in a few DAWs.
Cubase arranger track:
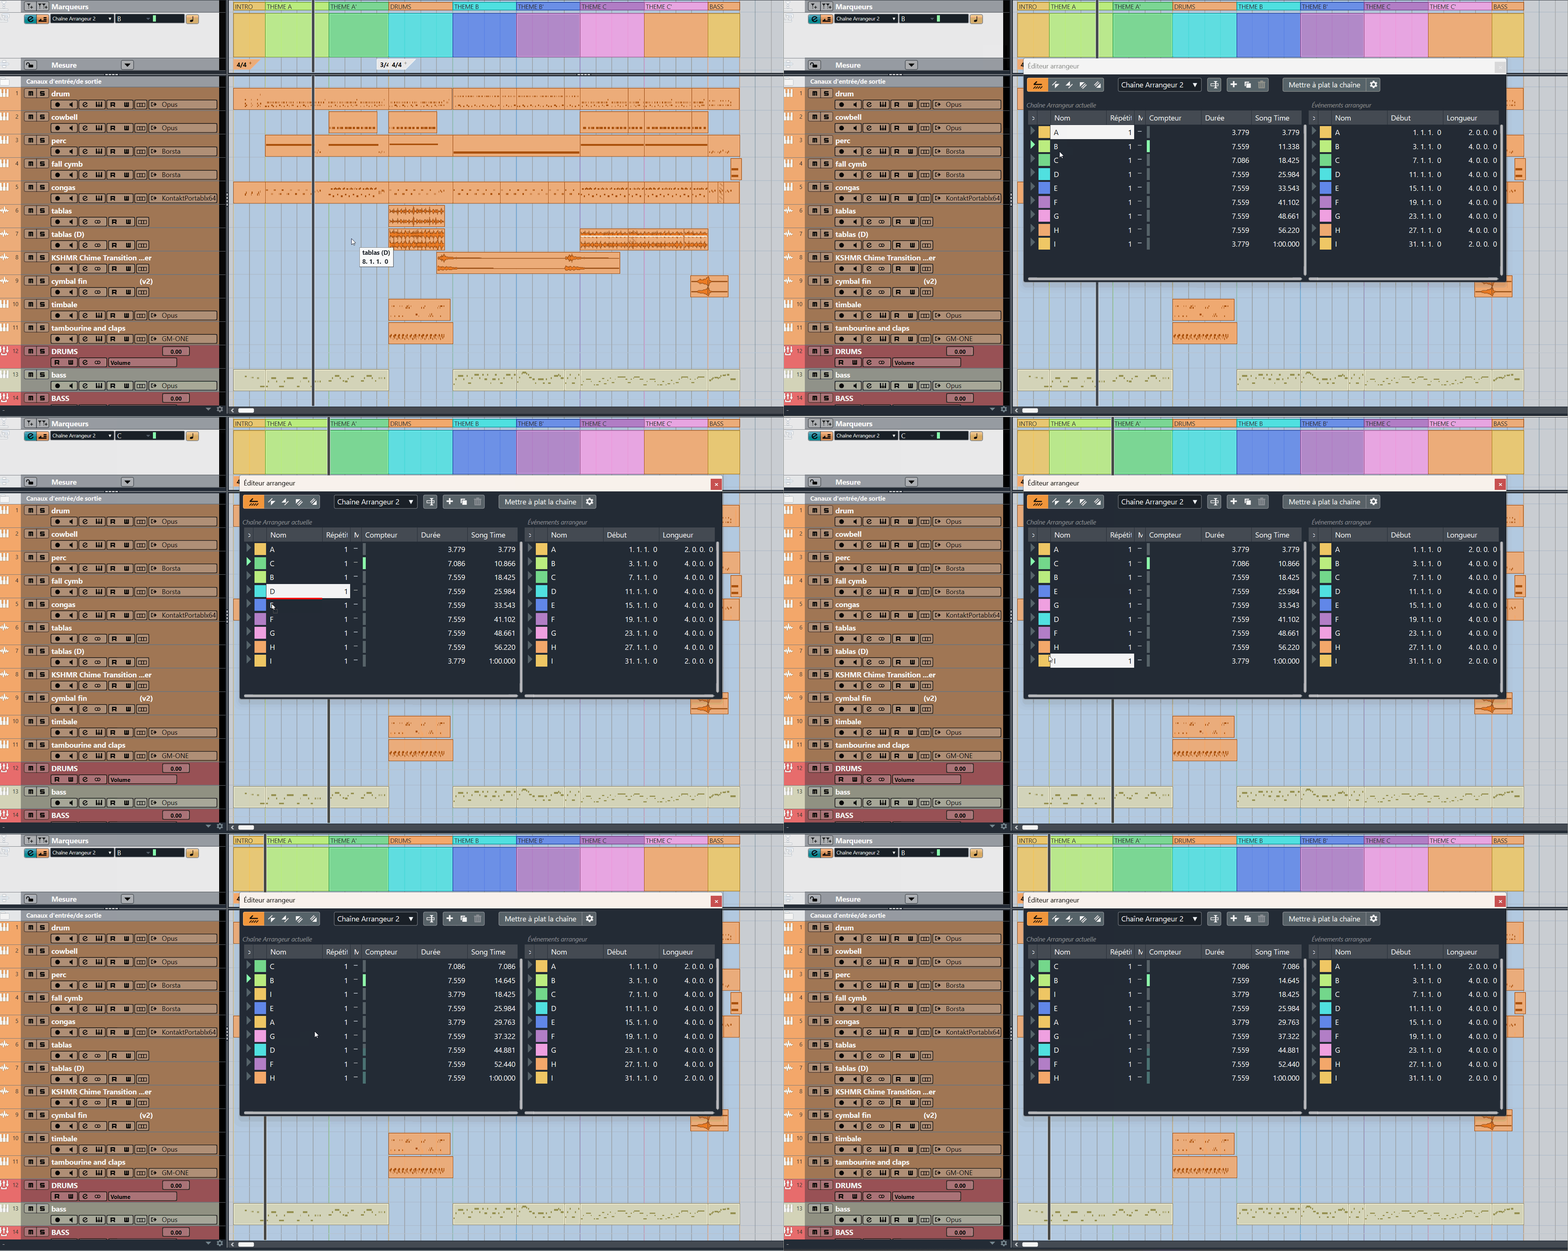
Consider the Arranger track as an extension of the region markers. It allows you to restructure your piece on the fly without altering your session. This avoids tedious manipulations that hinder the efficiency of comparative listening. Once the new structure is finalized, simply click on "Flatten the chain" to apply the changes. The region markers will adjust accordingly for optimal organization!

Management of the display of marking lines:
Most STANs allow you to view the guide lines throughout the session. While useful, this feature can interfere with video synchronization with position and region markers. In Cubase, you can customize this display based on the selected track.
💡 Go to Preferences > Bookmarks and choose to display:
All the tracks
Selected track
None

Click on the small arrow to clear your session view!
Reaper Marker System:
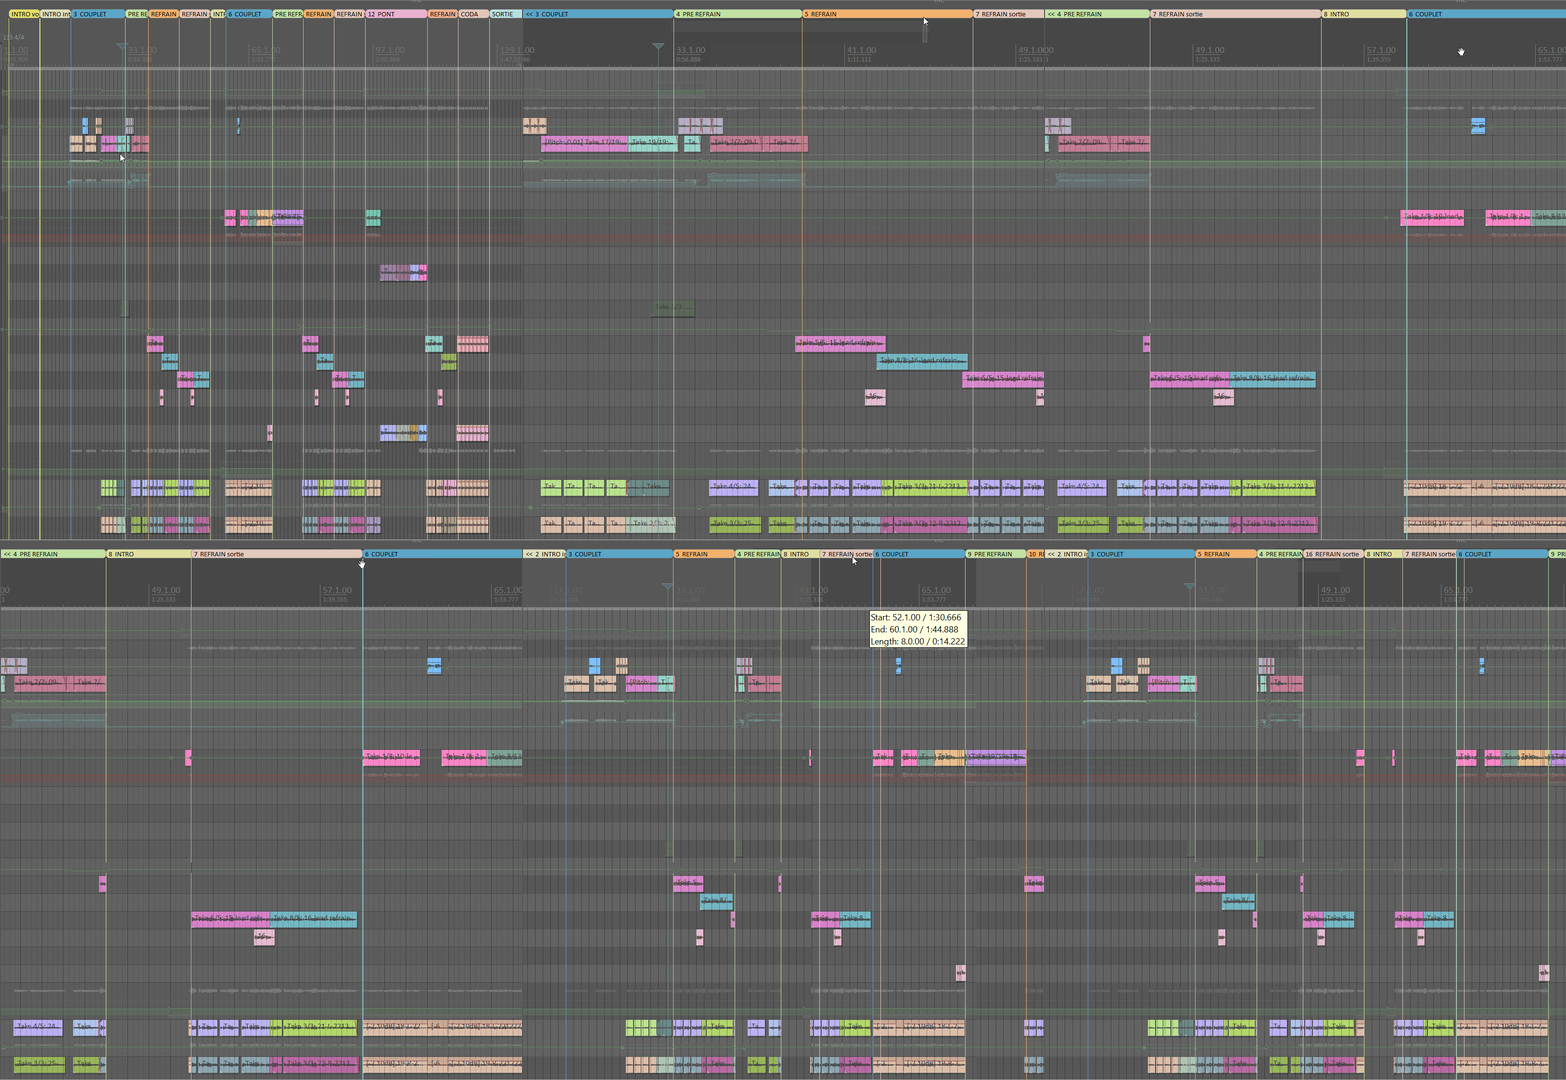
Position markers work similarly across all DAWs, but Reaper's region markers are a hybrid between region markers and the arranger track of Cubase. Once set, you can move an entire region or duplicate it with a single click — very convenient!

The management of markers in Reaper is very comprehensive.
Notes on Ableton markers:
Although Ableton does not have region markers, its position markers have a unique feature: marker notes. These small notes appear when you click on a marker, making them ideal for jotting down a to-do list, lyrics, or reminders. This is convenient for collaborative work or revisiting old sessions.

The "reference note" function is very interesting. It even allows the integration of emojis!
Display of markers in the editor (Cubase/Reaper):
The ability to view markers within audio and MIDI containers is very useful when writing or producing. In Reaper, this happens automatically. In Cubase, you need to click on “Show Global Track” in the MIDI or audio editor. The Global Track includes markers, tempo, time signature, and even the video track.

💡 In Cubase, click on the arrow to reveal the markers.

💡 In Reaper, everything is already there !
I hope this guide will help you make better use of markers during your sessions. Check out my other articles for more tips, including how to build a sit-stand desk for a home studio for under €150.
Feel free to comment and share on your social media — more articles are coming soon! 🙏